Primer and painting of the interior of the car
Now has come the time to put some more paint on the car. The original color of the interior is in a different color than the outside. The issue here, is that there are no color charts telling witch colors there is to choose from. The most evident is that the factory used RAL color codes. These are standard colors, no matter if you choose acryllic, water based, epoxy or any ting else, the colors are the same.
A 1941 Packard 120 came by the shop this weekend
This Packard has been in storage for approximately 30 years if not more. It is unrestored but repainted at some point in time and I believe that the mileage is relative low for this car, since the interior is in very good condition.
On one of the doors there is a sticker that says that the last service was made in 1966, but the wiring harness have been changed somewhere between the 80's and 2000, so therfore I suspect there has been a some aditional service at the same time.
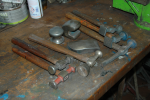
Hopefully this collection of tools will grow a bit
Ok, so I have been working with some sheet metal repair prior to the painting, and therefore I'll be talking a bit about the tools that I use.
I have a sound set of hammers and dollies for some of the basic work that is good for bending and stretcing the sheet metal. With the hammmer and the dollie I pull in/out dents and som ocasional bending on deformed sheet metal on the car.
One of my hammers is a shrinking hammer, witch means that when you hammer on the sheet metal, the hammer head rotates slightly with each blow and the swirl shaped grooves pulls the metal toward the centre, hence shrinking the metal in the worked area.
Preparation before some paiting
Hi again, I´m back after a long time with no updates.
There has been a lot of sheet metal work on the body shell, and a lot of delays caused by private obligations. Hopefully now we are back on track with the project.
Since the last update, the car is back from the media blaster. The car was blasted with corundum with is less agressive than steel grain or sand, and it gives less deformation of the metal sheet and it is still a effective way of getting rid of surface rust. They also sprayed the blasted area with som high quality epoxy primer, with made it easy for me to start sealing all the panel joints on the body shell.
Paint removal
Removing paint on a car is at tedious job, specially if you aim at removing all the paint in order to do some sheet metal work or the paint is in such a condition that it all have to come off. I usually prefer to remove all paint in order to find old shoddy repairs that are done only with filler. Areas with thick layers of filler are a source of troubles. The “bondoe” will sooner or later start to crack and loose its grip onto the sheet metal if it was applied in a to thick layer. The maximum layer thickness to apply is about 5 mm. (If you need more than 5 mm of filler you haven’t done your sheet metal work well enough).
Paint removal and repairs on the body shell
As in the article about paint removal I have used the process with the heat gun and oscillating sander for removing all the paint. I did find some poor repairs and some additional rust damage witch is now corrected. The outer side of the body have now been painted with an epoxy based primer of good quality. Good adherence to the bare metal is crucial in order to have a good rust protection.
From old to new and shiny
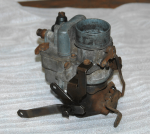
 Here i´ll explain how I like to clean a carburettor, and this goes for a carburettor for a early cars from the twenties up to some of the last carburettors that came just before the the electronics on these objects. The reason that I don´t do so called modern (with electronics) carburettors is that they are to fragile and complicated, and the cars they sit on do not interest me – but that is just a question of taste.

